Wednesday, January 15, 2020

January Technique Hop - "Terrific Treats"

Welcome to the CTMH Technique Blog Hop! 
This month there are 10 CTMH consultants using CTMH products in their artwork to create a variety of Techniques  making "Terrific Treats".  This blog hop is a great big circle so you can start wherever you want and continue through to see all the fabulous "Terrific Treats" artwork.  If you are coming from Michelle Loncar's Blog you are on the right track!  If you get lost, you can find the list on the bottom of Melissa's blog.  
Here we go!

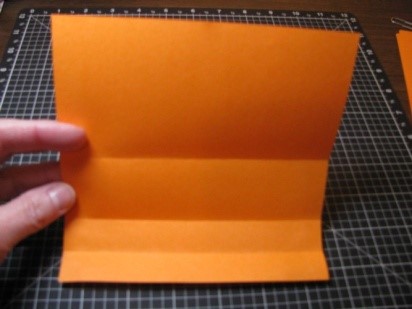
I found a cute mug tutorial on Pinterest.
The pictures looked life size but once I cut it, the mug is only 3 inches tall.  So the one instruction I changed was making the vertical scores only one inch.  I inserted the tab for the handles into the fold by the glued edge.  It's really easy and fast.  I also used the Oh My Heart paper, sticker, and stamp and raspberry ink.  I random stamped the tissue paper using a cluster of the Oh My Heart stamps. 
I was able to insert a small candle in the mug as the "treat".
This was the arrangement of the cluster of stamps 
that I used on the tissue paper.

 I cannot wait to see what others have done.  
Now hop on over to Haley Dyer's Blog to see what kind of fabulous "Terrific Treats" she's created.  Be sure to drop a comment, we enjoy the encouragement. I hope you enjoyed this hop.  If you see items you would like to purchase, contact your CTMH consultant or you can Shop HERE

Tuesday, January 14, 2020

Origami Wreath

I've enjoyed making this paper wreath many time, mostly for a Christmas decoration.  I've even created them with kids and they pick up the instructions quite easily and have even taught their parents.  I first saw this wreath at a team meeting 6 years ago with Julie Reynolds  Here is what she shared.

Origami Wreath

Julie Reynolds – February 2014

The following instructions are to create a wreath approximately 6 ½” across.
Use a bone folder to firmly crease all your folds, being careful not to catch any folded edges with the tip of the bone folder – you don’t want to tear it. 


  1.  Create a folding template:   Fold a 6” piece of scratch paper in half.  Bring one side up to center crease and fold again.  Repeat.  You will use the last section you folded, which is 1/8 the width of your paper, for your folding guide.
  2.  Cut twelve 6” squares of CTMH B&T Duos.  You will fold 6 featuring one side, and 6 featuring the other side.   
4.  Insert one 6x6 piece into your folding template.  Using the narrowest fold as a guide, bring the outside edge of your BT Duo over to the edge of the guide and fold.


5.  Repeat this on all 4 sides of paper:    

.       Fold both bottom corners up to the closest fold (but do not overlap fold.)  Note:  Each time you “fold to meet,” a crease or another paper edge, it’s best to be just a hair short of it, rather than touching it.
6. Turn paper 180 degrees.  Fold bottom section up at closest horizontal crease, leaving just the tips of triangles showing.
     
  7. Turn piece over.  Fold the little outside corners inward.


8.    Fold bottom section up, at the first horizontal crease just below the little triangle; this will look like a little hat.  Then fold the two sides forward, making use of the vertical creases (do NOT create a new crease here!)  Then lay it on your work surface and crease these folds well with your bone folder to finish your first wreath 
piece.


  9. Now repeat those steps 11 more times to complete your 12 wreath pieces.

    10. Assemble your wreath by inserting the 2 loose ends of one piece into the little pockets on both sides (front and back) of another piece.  Repeat until you have placed all 12 pieces, joining the last 2 together.  No gluing is necessary.


Now be creative and embellish as you’d like.  Hot-glue or use Glue Dots to attach a ribbon to the back for a hanger . . . Add flowers or buttons to the front . . . Have fun!

Here are more wreaths.  The Christmas one is made with 6” pieces, the two smaller with 4” and 3” pieces.  The 3” wreath makes a nice tree ornament.  The larger the piece, the easier it is to fold.

Two other tutorials:


http://artfullcrafts.blogspot.com/2011/12/sandy-origami-wreath-tutorial.html

YouTube video

Origami 3D Ring (Paolo Bascetta)

Friday, January 10, 2020

Oh My Heart Blog Hop

Welcome to the CTMH Oh My Heart Blog Hop.
The Oh My Heart Special was designed to show some Valentine’s Day love with the cards and scrapbook pages in the Oh My Heart special! With a brand-new paper packet, sticker sheet, stamp set, and exclusive workshop kit options, the Oh My Heart special is sure to capture your heart! 

 If you came here from Gina's Blog you are on the right path!  The blog hop is a great big circle, so you can start here and work your way all around.  If you get lost along the way, you'll find the complete list of participating consultants on Melinda's Blog HERE.  This month we have 6 CTMH consultants sharing their creations using the CTMH Oh My Heart special with other great CTMH products on their blogs.  This is simple to do - just click on the link at the end of the post on each blog to move to the next one!   Here we go! 

For Christmas I made origami wreaths and thought.... 
Why not a Valentines  Wreath?!
It takes 3 sheets of paper cut into 6 inch squares - you can make them any size, that's the size I made. So you can use 3  different patterns/colors (4 each) or 2 different patterns/colors (6 each). I will get instructions tonight.  I will need to repair the butterflies (cricut to the rescue) !! I tried to add some red shimmer to the hearts = big opps! So tried to cover with gold glitter gems and it's not working for me.  

I do have instructions somewhere from Julie Reynolds 
and will keep looking for them.  In the meantime,
I also found a YouTube tutorial at
its a little different, though ends up the same and with those instructions, you can make it pretty much any size. 
Found another tutorial on Pinterest @ http://artfullcrafts.blogspot.com/2011/12/sandy-origami-wreath-tutorial.html- ends the same, 
though has weird measurements. 

Now "Hop" on over to Miss. Carrie's Creations to see her work!  Be sure to visit all the consultants on their blogs to get some great crafting ideas. Please leave a comment, we love your encouragement. 
 From now through February 29, you can get the exclusive Oh My Heart paper packet, coordinating cardstock, and stamp set for all your Valentine’s crafts! Save 25% when you purchase these items as part of a workshop kit that includes the papers, cardstock, and stamp set, together with additional supplies for creating beautiful handmade cards and scrapbook pages! To get any of the products you see, contact your CTMH consultant or click HERE.

Wednesday, January 1, 2020

January SOTM Blog Hop - Everyday Magic

WELCOME to the January SOTM Blog Hop  
featuring "Everyday Magic" a set of 17 stamps. 
 It will be fun to see all the stamping inspiration found on this hop. If you came here from Kathy Burrows you are on the right path! The blog hop is a great big circle, so you can start here and work your way all around.  If you get lost along the way, you’ll find the complete list of participating consultants on Melinda’s Blog' found here.  
This month we have approximately 16 Close To My Heart Consultants sharing their creations using the January SOTM and other great CTMH products on their blogs.  This is simple to do - just click on the link at the end of the post on each blog to move to the next one!  
Here we go!
I'm working on a Card Buffet with a focus of Fun Folds.
Here's one for the team using the January SOTM!

I felt my card needed more "pizzazz", so added cool mint stickles
 around the sentiment and fussy cut some  flowers to add more interest. 
Here are the measurements and instructions. 
  1. To get two cards from a sheet of DSP, cut your paper to: 12" x 11".
  2. With the 12" side running across the top, score at: 2", 4", 8" and 10".
  3. Rotate a 1/4 turn and place your 11" edge across the top of your paper trimmer (the score lines will be perpendicular to your cutting blade), and cut at 5 1/2".
  4. Now you have prepared two card projects.
  5. With the long side (12" side) running across the top, make pencil tic marks on the right and on the left sides, at 1 1/2" up each, from the bottom.
  6. On each side; cut from that pencil tic mark diagonally up to the top edge of your DSP to the second score line (towards the inside of your card).
  7. Those triangularly cut off pieces will have the necessary score line to fold on and be properly added at the base of your card. Open the card and take the top right triangle you cut off and flip and turn it to fit the bottom left corner. The 90 degree angle will align with the angle created by the inside fold and the bottom of the card. The bottom point on the left will  fold out to be  glued to the card front and the rest of the DSP will be adhered to the inside of your card. Do the same (reversed) for the other triangular piece. (hopefully when my phone is charged I can show via photo)
 Now "Hop" on over to the beginning of the hop, Cat Nowak's blog, to see her inspiring work!   Be sure to visit all the consultants at their blog to get some great crafting ideas!  Please leave a comment, we love your encouragement.  Remember, the January SOTM is only available until January 31!  Contact your CTMH Consultant or (click here) to see how you can get this stamp set at a discount!

Monday, December 30, 2019

Bring Back My Pack - Urban Blog Hop

Welcome to the CTMH 
Bring Back My Pack - Urban Blog Hop. 
Get ready for a blast from the past with the return of the Urban paper suite! This slimmed down and updated paper packet is sure to be a go-to with its unique vibe! Along with a brand-new sticker sheet and a coordinating cardstock pack, the Bring Back My Pack special also includes a new workshop kit, with materials you need for creating layouts and cards for every occasion. Save 25% on the Urban Workshop Kit that includes the Urban Flair stamp set! The Bring Back My Pack—Urban special is available only while supplies last, so be sure to get yours before they’re gone! Offer available December 1 through January 31. Shipping and handling based on full retail price of all items.   
 If you came here from Kathy Burrows' Blog you are on the right path!  The blog hop is a great big circle, so you can start here and work your way all around.  If you get lost along the way, you'll find the complete list of participating consultants on Melinda's Blog HERE.  This month we have 8 CTMH consultants sharing their creations using the CTMH Bring Back My Pack—Urban special with other great CTMH products on their blogs.  This is simple to do - just click on the link at the end of the post on each blog to move to the next one!   Here we go! 
Thursday, I'm going to have a Fun Fancy Folds Card Buffet, my first!  I will definitely be using Urban for at least one card.


Measurements for the Fun Fold Card,
French Vanilla -card base - cut @ 4-1/4 X 8-1/2 score @ 3"
Card base insert - cut @ 3 X 8 and score @ 4"
Urban patterned paper:
  •  center inside: sapphire print - 4" X 5-1/4 
  • closed top right:  "crackled" saffron - 2-3/4 X 4
  • closed top left: pewter tread print - 2-3/4 X 3-3/4 
  • inside open left and right: "crackled" saffron
  • Lt. 2-3/4 X 4" Rt. 3-3/4 X 2-3/4" 
embellished top with zipstrip, stamped gears topped with Sapphire shimmer brush, mink twine , most stamping was Sapphire - the gears started out with Pewter, then painted with Sapphire shimmer.

I really LOVE this paper!!  When it first came out, I made a layout using the November 1, 2015, SOTM "Cheers, 2016."

Now "Hop" on over to Cat Nowak's blog to see her work!  Be sure to visit all the consultants on their blogs to get some great crafting ideas. Please leave a comment, we love your encouragement. This special is only available through December 31. To get any of the products you see, contact your CTMH consultant or click HERE. 

Sunday, December 15, 2019

Season to Sparkle

Welcome to the CTMH Technique Blog Hop! 
This month there are 11 CTMH consultants using a variety of "Sparkle" Techniques along with other current CTMH products in their artwork.  This blog hop is a great big circle so you can start wherever you want and continue through to see all the fabulous artwork incorporating layering techniques.  If you are coming from Haley Dyer's Blog, you are on the right track!  If you get lost, you can find the list on the bottom of Melissa's blog.  Here we go!


I went with some red shimmer trim, gold foil paper, gold embellishing thread, and clear sparkles.  The sentiment is from the December SOTM.  
CTMH has LOTS of choices when it comes to accessories that Sparkle; shimmer trim (4), glitter paper (4) foil paper (2), glitter gems (3), shimmer brushes (9), clear sparkles, sequins (4) gold sequin ribbon,  gold and white ribbon, embossing powders (8), stickles (10), gold/silver thread.  Mathematically, there is an endless choice of possibilities to inspire me for a "Season to Sparkle" creative project. Here's a quick and simple card with lots of sparkle and bling. I cannot wait to see what others have done.  

Now hop on over to Miss. Carrie's Creations to see what kind of fabulous layering techniques she's created.  Be sure to drop a comment, we enjoy the encouragement. I hope you enjoyed this hop.  If you see items you would like to purchase, contact your CTMH consultant or you can Shop HERE

Sunday, December 1, 2019

December SOTM Blog Hop - Reindeer Crossing

    
WELCOME to the CTMH December 
SOTM Blog Hop featuring "Reindeer Crossing" 
a set of 10 stamps.  
It will be fun to see all the stamping inspiration found on this hop. 
If you came here from Lauren Moore's blog you are on the right path! The blog hop is a great big circle, so you can start here and work your way all around.  If you get lost along the way, you’ll find the complete list of participating consultants on Melinda’s Blog' found here.  
This month we have approximately 16 Close To My Heart Consultants sharing their creations using the December SOTM and other great CTMH products on their blogs.  This is simple to do - just click on the link at the end of the post on each blog to move to the next one!  
Here we go!


I had too many ideas for this card and decided on the shaker with the deer silhouettes adhered inside the shaker but in the foreground against the window so the sequins shake behind them. 
I used 4 out of the 10 stamps - evergreen and pine cone boughs stamped in evergreen and espresso - and fussy cut. 

 Now "Hop" on over to Kim Loewen' blog to see her inspiring work!   Be sure to visit all the consultants at their blog to get some great crafting ideas!  Please leave a comment, we love your encouragement.  Remember, the December SOTM is only available until December 31!  Contact your CTMH Consultant or (click here) to see how you can get this stamp set at a discount!