Welcome to Postcard Perfect

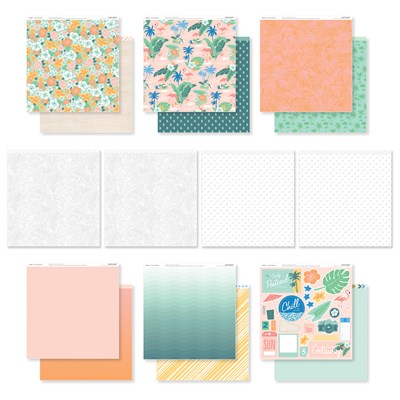
We will be featuring our special for May, celebrating National Scrapbooking month with a gorgeous suite of papercrafting products "Postcard Perfect" a collection of coordinating Postcard Perfect products, including a paper packet, stamp set, coordinating cardstock pack, and Cut Above layout kits. You can also earn a FREE postcard Perfect Cut Above Layout Kit by signing up as a Consultant or hosting a qualifying party this month.
If you came here from Catherine Nowak's blog you are on the right path! The blog hop is a great big circle, so you can start here and work your way all around. If you get lost along the way, you’ll find the complete list of participating consultants on Melinda’s Blog: HERE .
This month we have approximately 16 CTMH Consultants sharing their creations using Postcard Perfect and other great CTMH products on their blogs. This is simple to do - just click on the link at the end of the post on each blog to move to the next one! Here we go!


I've been wanting to make this "Star Effects Standup Card" and thought the Postcard Perfect paper would be.... PERFECT! You can use any sentiment, I thought "count your blessings" was from the Flower Market stamp set, - but it's retired (D1705) I found I had "Love" (D1728) so added that also and updated this post!
I'm enjoying a weekend with friends on a beach near Seabrook, WA. I took off work for a 4 day weekend, packed the Postcard Perfect papers, ink and some stamps... and then found that I left some supplies at home - over four hours away. 1) forgot the stamp set so fussy cut the flowers and 2) added a touch of gold with the Shimmer Brush. (didn't have sequins or sparkles.)
Here's a tutorial for the Star Card.
The base (black card stock) was cut at 5 X 6 - folded in 1/2 and then cut from the fold to the outside edge into a triangular base.

Slits to hold the insert were cut at 2 inches from the bottom corner and cut 3/4 inches deep (I made a small wedge).
Keep the two Triangles pieces that were cut from the 5X6 paper and decorate them with patterned paper triangles cut from a 4 3/4 X 5 3/4 rectangle cut in 1/2 the shorter width and then cut into 4 triangles, and decorate. These pieces are then glued into a "V" - see the photo. decorate as desired.

This card is mailed flat and will need instructions to set it up once opened.
You can write a personal message on the back.


Now "Hop" on over to Krista Hershberger's blog to see her work! Be sure to visit all the consultants at their blogs to get some great crafting ideas! To get any of the products you see, contact your CTMH Consultant (or click here)
Wow that is a great card, I love it, so unique!
ReplyDeleteSpectacular cards! Gorgeous!
ReplyDeleteThank you for sharing this sweet card. You make it easy to scraplift! Always, Alayne
ReplyDeleteAmazing card! I is gorgeous!
ReplyDeleteHow beautiful!! Thanks so much for sharing the tutorial too! :)
ReplyDeleteDarlys, that's perfect paper for that card! Love how it's still mail-able too!
ReplyDeleteHow cool is this card!!
ReplyDelete